|
"As a subscriber to the digest form of the windsynth list, I read your WX5 tips and tricks. I have owned a WX5 (and a VL70m) since August 1998, but I had not really looked into some of the possible configurations of the instrument until I read your notes (while I was at work!). As soon as I got home I reconfigured the D and D# key for growl and scream, changed action from slow to fast (what a difference a switch makes!), and moved from Sax a fingerings to Sax b mode. In other words, the tips are great. Thanks for the work you have done not only on these tips but also for your contributions to the windsynth list. I always enjoy reading your contributions."
Peace,
Bob Stead
robert@*****.com
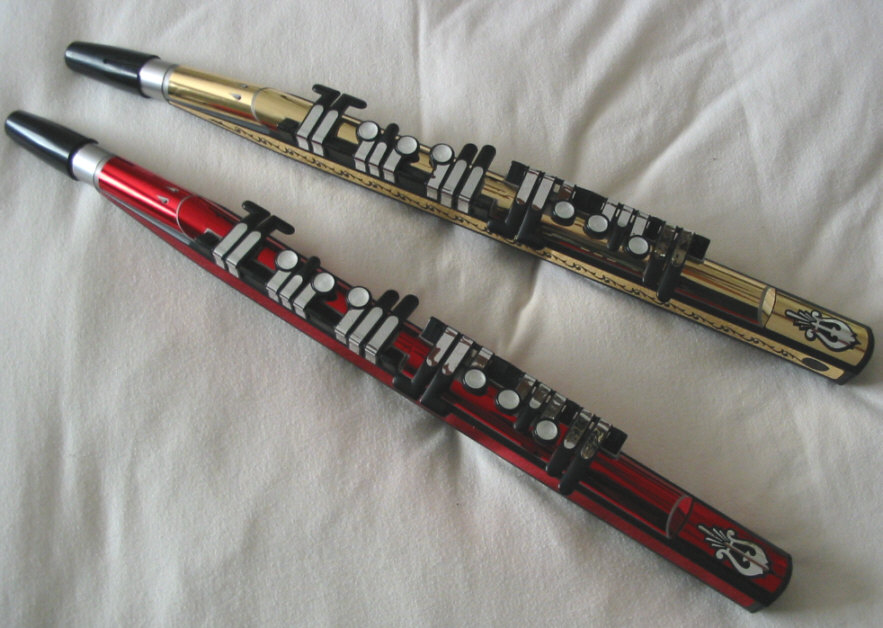
Custom WX5 "skin kits" by Eddie Davis  and installed by myself. and installed by myself.
WX5 tips and tricks.
(C) © Copyright 1999 by Bob "Notes" Norton, all rights reserved. For permission to copy and redistribute this, please contact Bob "Notes" Norton. Use the email link at my website https://www.nortonmusic.com/
The WX5 is the most powerful and potentially expressive wind controller Yamaha has released to date. It surpasses the WX11 and even the WX7 in both features and MIDI control. The WX5 could possibly be the best wind controller on the market today.
I have played both the WX7 and WX11 professionally for years and I've owned a WX5 since it was put on the market. Here are a few things I have learned about the WX5. Following these suggestions may help you get the best and most expressive music out of your WX5.
When reading this guide, please note; we are all different, we have different physical characteristics, different musical tastes, different playing habits, and different modes of expression. In addition, we will utilize our wind controllers to play different styles of music, and we will use our controllers with different sound modules. For these reasons, please accept these guidelines as merely suggestions. In music and especially synthesis, one size does not fit all. Feel free to experiment.
One more thing, when making any adjustments to your WX5, please refer to the instructions in your WX5 manual. There is no reason to reproduce the manual here, it comes with the WX5. If you bought your WX5 used, the manual is available online at the Yamaha web site . I cannot be responsible for anything you do to your WX5 nor for any typographical errors that might be on this page, so refer to the manual before you apply any of these suggestions to your WX5.
After applying a few of the following suggestions, a little practice may be involved learning to play and control your WX5. Neither playing music nor learning a new musical instrument has ever been an instant gratification process. However, the learning process can and should be fun. To make the learning most enjoyable, play songs you like. Start out with songs that have notes of long duration and slower tempos and songs you know well. That will help you focus on the instrument technique and not the complexities of the music. Try to learn one skill at a time. If frustrated, put it away and pick it up later. Music should always be a joy, even in the early stages. Before you know it, you will find that you no longer have to think about the mechanics of the controller -- just as a bike rider does not have to think about balancing himself or herself on the bike or turning the pedals. It just happens. Play often, even if it is only a few minutes per day.
To increase your fun and make your practice a joy, use Band-in-a-Box and Norton Music's award winning after-market Power User Styles as your background band while you play your WX5. You can even purchase a Norton Music Fake Book and Disk, insert the disk, open the book, and play along reading the music while your computer plays the rhythm section. (This is a shameless commercial plug.) For more information and MP3 file demo samples, go to Norton Music's web site: https://www.nortonmusic.com
Your sound module, (tone generator or synthesizer) should be wind controller friendly. There are tips on this subject in your WX5 manual and the IWSA (International Wind Synthesis Association) website. The most important criteria might be to be sure your sound module can accept continuous controller 2 (cc2), breath control. If not, a MIDI mapping product can map the cc2 from your WX5 to cc11 or another substitute controller, you can even get the WX5 to send volume instead of breath control. However, since in a good wind friendly sound module, the breath controls more than volume so there is an advantage to getting one. I suggest using Yamaha's VL70-m tone module because it is very wind controller friendly and it was built with the WX5 in mind. (Note: I am not currently nor have I ever been on the Yamaha payroll -- however Yamaha, if you are reading this - hint - hint <grin>.)
OK, let's get on with the tips
 1.) Mouthpiece. I suggest the saxophone type, even for those who came from a flute or recorder background. It may take a little time to get used to this, but the advantages are well worth the effort. The ability to control pitch bend with your lip will add expressiveness to your music. Using the lip to control pitch bend will also free the other controls on your WX5 which can then be used for other musically expressive functions. 1.) Mouthpiece. I suggest the saxophone type, even for those who came from a flute or recorder background. It may take a little time to get used to this, but the advantages are well worth the effort. The ability to control pitch bend with your lip will add expressiveness to your music. Using the lip to control pitch bend will also free the other controls on your WX5 which can then be used for other musically expressive functions.
2.) Lip Mode. Tight lip mode is the best way to go. This allows you to bend the pitch both up and down which will enable you to produce a natural sounding vibrato, sax and voice like pitch scoops, guitar like string bends and many more ear pleasing effects. Note: In both mouthpiece selection (1) and lip mode selection (2) it is important that you follow these suggestions to get the greatest expressive control out of your WX5. By using the recorder mouthpiece or the loose lip mode, you will cripple some of the most important expressive controls the WX5 is capable of producing. The whole concept behind wind synthesis is to make a more expressive instrument.
3.) Wind Zero and Wind Gain. Your objective should be to have as much Wind Gain as you can and still adjust the Wind Zero. This should enable you to have the maximum control over the volume of your music. For those of you who use diaphragm vibrato (tremolo), high wind gain is essential to have good control over the vibrato. The adjustment procedure is explained in the manual. Proper adjustment takes going back and forth between both controls a few times, unless you get real lucky the first time. (I turned mine up all the way and then backed it off just a little until the WX5 responded well and zeroed.)
4.) Lip Zero and Lip Gain. As it was with the Wind adjustment (above), it is essential that you adjust your WX5 so that you can have as much Lip Gain as you can and still be able to adjust the Lip Zero. You cannot get good lip vibrato nor can you have maximum control over the pitch without a lot of gain on your WX. Once again, it is essential that you read the manual for the procedure. Note: Since the pitch bend curve of the WX5 is steeper in the up position than in the down position, I suggest that you start by setting your synths pitch bend response to +1 in the up position and -2 in the down. This setting will give you the smoothest vibrato.
5.) Mouthpiece position. While I am on the subject of vibrato it is a good time to bring this up. Unlike a sax or other reed instrument, the reed doesn't vibrate and doesn't have to be very far in your mouth. The ideal way to play all the WX instruments, (and especially the WX5) is with as little of the mouthpiece actually in your mouth as possible. Your lower lip should be as close to the very tip of the reed as it can while playing. For sax players, especially tenor and bari players, it will feel strange at first but once you get used to it you will see many advantages. This method is the only way to get good vibrato out of the instrument. The cantilever inside the mouthpiece extends to almost the tip of the reed. By placing your lip at the tip you eliminate any give and take or binding of the materials. This enables you to have a smooth vibrato.
6.) Reed maintenance. Related to the two above items. The cantilever has a tendency to wear a little notch in the bottom of the reed. Carefully following the instructions in the manual, remove the mouthpiece and reed and inspect the bottom of the reed periodically. If the cantilever has worn a little groove, it is time to replace the reed. Some people have filled the groove with a little glue. Some have applied a little sandpaper to the reed to smooth it out. If you decide to try either the glue or the sandpaper, you do so entirely at your own risk.
7.) Tonguing. Unlike the sax or clarinet, tonguing does not involve touching the reed with your tongue. The action is more like a flute. Touch your tongue to the top of your mouth behind your teeth as if you are saying "ta ta ta" into your WX5. Putting very little mouthpiece in your mouth (5.) makes this method of tonguing both easier and more precise.
8.) Fingering mode. Choose either saxophone B or saxophone C. At first I used sax C but I found I wanted the trill keys more than the alternate fingerings so now I use sax B. It is my opinion that Saxophone A and the flute modes limit your options and that in turn limits your potential expressiveness.
9.) Octave keys. They drove me crazy at first, but once I got used to them I decided I liked them. They are much quicker and easier than the old WX7 and WX11 modes. I find holding my left thumb to the right of center in that little circle between the up and down octave keys helps a great deal. The idea is that when going for the first up octave, you only press the right point of the octave key crescent. Then when you want to go up again, you move your thumb up and to the left, and so on. This is the easiest way to play only one octave key without accidentally pressing the second one too. I have heard some other good suggestions but this is the one that I found works best for me.
10.) Right thumb rest and pitch bend wheel. Using a neck strap helps with the stability of the horn while using the pitch bend wheel, but I never use it. Although the thumb rest adjusts up and down, I find it doesn't slide down enough for me to comfortably work the pitch bend wheel. Putting the first joint of my thumb under the rest and rocking the wheel by flexing my thumb seems to be the best way for me to approach it.
11.) Setup Switch Settings. These set the default mode of the WX5, or how it plays when first turned on. Many of these defaults can be changed while playing (see pages 13-21 of the manual). If you changed the settings for a particular song, pressing the three following buttons at the same time will reset your WX5 to the default mode: Setup Key, Key Hold Button, and Program Change Button (see diagram on page 6 of your manual). For an illustration of the DIP switches, see page 22 of the manual. The following settings I found provide the best 'playability' and the greatest amount of potential expression from your WX5. I use my WX5 with a VL70-m, you may want to modify a few of the following settings if you are using a different tone module.
As explained in the manual, left is OFF and right is ON for the switches when holding the WX5 so the mouthpiece points up and the DIP switch compartment is facing you.
11a.) Switch 1-1 (Vel) - Velocity. Setting OFF (pushed to the left). This one is a no brainer, setting it to OFF allows the key on velocity to be set with the wind. (Turning it on fixes the key velocity at 100.)
11b.) Switches 1-2 and 103 (Win) - Wind sensor to MIDI data. Set both OFF. For certain non wind friendly sound modules, you may have to change the settings of this and 11a (above) but for wind friendly modules, leave them all in the off mode. This will allow your breath control to control volume and other patch dependent parameters, like brightness.
11c.) Switch 1-4 (Win) - Wind Curve. Leave this one OFF unless you really cannot adjust to using less air than other wind instruments. Even though I play much harder on my saxophones, I find the response of the WX5 seems much better with this switch in the OFF position.
11d.) Switch 1-5 (Lip) - Tight Lip / Loose Lip Mode. Keep this one OFF. OFF puts your WX5 in the tight lip mode, and that is where you want to play it. There is no reason to play the WX5 in the loose lip mode. Why limit you to only an up pitch bend? The loose lip mode makes a sax emulation nearly impossible, since most sax players, sooner or later scoop up to the pitch. This also applies to many other instruments. If you have a little trouble keeping on pitch at first, keep at it, the rewards in the long run will far outweigh the difficulties you may experience now.
11f.) Switch 1-6 (Lip) - Lip Data Range. This one you should move to the ON position. This gives you the most control with the pitch bend. If you find it too sensitive, adjust the patch, not this switch. I find the vibrato characteristics much more playable with this in the ON (wide) range.
11g.) Switch 1-7 (Lip) - Lip Data. Put this one OFF. That will allow you to control the pitch with you lip. Putting it in ON will cause the reed to control modulation, which is a less realistic form of vibrato. If you happen to want that in a particular patch, make the adjustment in the patch.
11h.) Switch 1-8 (Lip+) - Lip + Control Change Data. This really depends on the sound source, the patches you play and what you want to do with it. I leave it OFF, but I can foresee a situation where I might want to change my mind, especially when the sound modules get more powerful. If you put the switch ON, it will send out continuous controller #18 along with the pitch bend information.
11i.) Switches 2-1 and 2-2 (Trns) - Transpose. This is your choice, it changes the key of the WX5 but not the performance characteristics. See the manual.
11j.) Switches 2-3 and 2-4 (Fing) - Fingering. The only two good choices are: 2-3 OFF and 2-4 ON for Saxophone B -- or 2-3 ON and 2-3 OFF for Saxophone C. Anything else limits the expressiveness of the WX5 (See item number 8). I am now using Saxophone B.
11k.) Switch 2-5 (Fast) - Fast Response. Definitely turn this one ON. You need fast response. Don't be tempted to leave this OFF so you won't have incidental tones between notes. In the OFF mode, the WX5 seems sluggish in response and will actually leave notes out of fast passages.
11l.) Switch 2-6 (Hi ct) - High D / D# Key Assign. Turn this one ON, and it gives you two extra continuous controllers to use. Although they are ON/OFF toggles, they can be used for many good effects. You do not need these keys to play the D or D#, you can use the octave keys with the lower octave fingerings for that.
11m.) Switch 2-7 and 2-8 (Whl) - Pitch Bend to MIDI data. Turn 2-7 on and leave 2-8 off. This puts you in mode 3, bending the wheel up controls cc16, down controls cc17. You can assign all kinds of cool parameters to cc 16 and 17 and then manipulate them in real time while playing your WX. A couple of suggestions are growl, throat, cutoff filter, LFO, brightness, or effects like Wah. You are only limited by your imagination and the sound module you employ.
There are quite a few other features on the WX5. They are all optional and depend on your individual taste. Since they are also explained well in the manual, I will leave them for you to explore.
Enjoy
Bob "Notes" Norton
Owner, Norton Music
If you have a VL70-m with the Patchman Music TURBO chip installed, be sure to visit my VL page. Click here and scroll to item 3.03
| 